


random user submitted photo
Cotton Waiex 191 - N191YX
Re: Cotton Waiex 191 - N191YX
![]() by Sonex1243 » Wed Jun 15, 2016 9:06 pm
by Sonex1243 » Wed Jun 15, 2016 9:06 pm
Great idea on the wing tip drilling tool Bryan, you always come up with something nifty. Do you recall any "tricks" for the 1/16" bevel on the fuselage splice plates? I am toying with an idea of a chamfer router bit in the drill press and swiping the flat parts across it and drill table set at a certain height to avoid a lot of filing / fitting.
Ken S
SONEX #1243 N424SX (reserved)
Tail complete, wings done
Fuselage on gear
Jab 3300 received!
SONEX #1243 N424SX (reserved)
Tail complete, wings done
Fuselage on gear
Jab 3300 received!
- Sonex1243
- Posts: 310
- Joined: Thu Jan 08, 2015 4:59 pm
Re: Cotton Waiex 191 - N191YX
![]() by Bryan Cotton » Wed Jun 15, 2016 11:09 pm
by Bryan Cotton » Wed Jun 15, 2016 11:09 pm
Ken,
I think I just used the vixen file followed up by the angle sander with scotch brite. I think that this is one of those jobs where the hard way is the easiest.
I think I just used the vixen file followed up by the angle sander with scotch brite. I think that this is one of those jobs where the hard way is the easiest.
Bryan Cotton
Poplar Grove, IL C77
Waiex 191 N191YX
Taildragger, Aerovee, acro ailerons
dual sticks with sport trainer controls
Prebuilt spars and machined angle kit
Year 2 flying and approaching 200 hours December 23
Poplar Grove, IL C77
Waiex 191 N191YX
Taildragger, Aerovee, acro ailerons
dual sticks with sport trainer controls
Prebuilt spars and machined angle kit
Year 2 flying and approaching 200 hours December 23
-

Bryan Cotton - Posts: 5022
- Joined: Mon Jul 01, 2013 9:54 pm
- Location: C77
Re: Cotton Waiex 191 - N191YX
![]() by Bryan Cotton » Fri Jun 17, 2016 6:34 am
by Bryan Cotton » Fri Jun 17, 2016 6:34 am
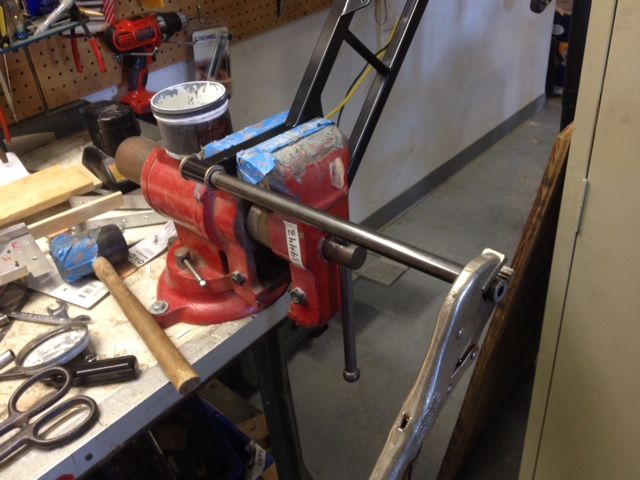
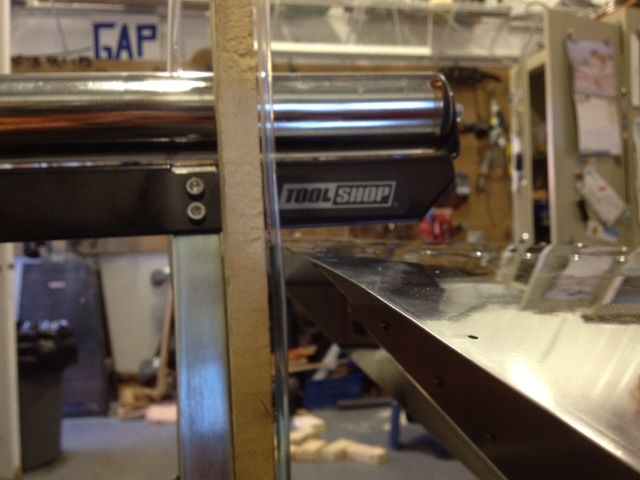
Here is my setup for pilot drilling the control sticks. It is important to use a spotting drill due to the angle of the weldment where the bit first makes contact.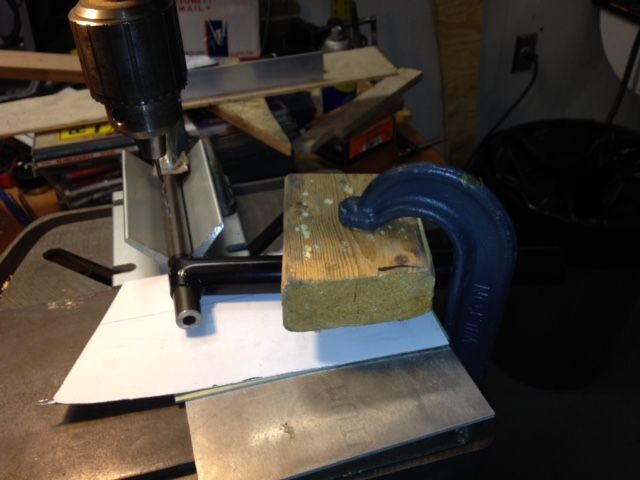

Bryan Cotton
Poplar Grove, IL C77
Waiex 191 N191YX
Taildragger, Aerovee, acro ailerons
dual sticks with sport trainer controls
Prebuilt spars and machined angle kit
Year 2 flying and approaching 200 hours December 23
Poplar Grove, IL C77
Waiex 191 N191YX
Taildragger, Aerovee, acro ailerons
dual sticks with sport trainer controls
Prebuilt spars and machined angle kit
Year 2 flying and approaching 200 hours December 23
-
Bryan Cotton - Posts: 5022
- Joined: Mon Jul 01, 2013 9:54 pm
- Location: C77
Re: Cotton Waiex 191 - N191YX
![]() by Bryan Cotton » Sat Jun 18, 2016 6:16 pm
by Bryan Cotton » Sat Jun 18, 2016 6:16 pm
I have a bunch of 5/8" flat reamers. I was able to run them through by hand without a handle.
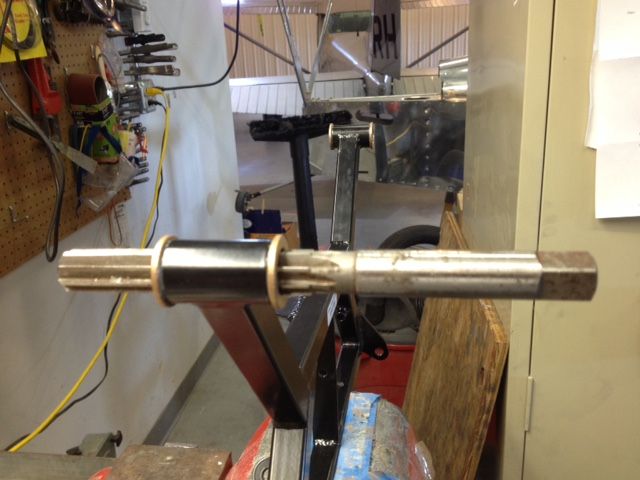
I could not get the other part of the stick through. I did have another 5/8" steel tube that was a little smaller. Another argument for polish over paint- I put some F9 on the bushing and tube and polished it up to a larger hole size.
After polishing with the tube, I repeated the process with the control stick part. Then I cleaned out the F9 and made this jig to align my stick halves.
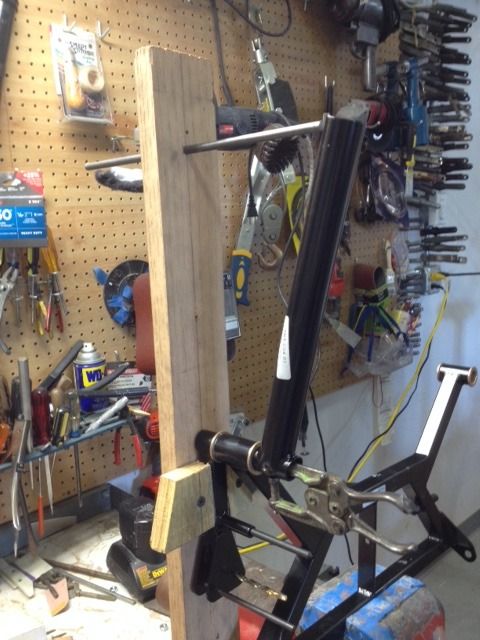
The plans specify some small clearance to limit fore-aft movement. I am going to make it tight and sand as required.
Adam has been busy so I am doing other things besides rigging the wings.

I could not get the other part of the stick through. I did have another 5/8" steel tube that was a little smaller. Another argument for polish over paint- I put some F9 on the bushing and tube and polished it up to a larger hole size.

After polishing with the tube, I repeated the process with the control stick part. Then I cleaned out the F9 and made this jig to align my stick halves.

The plans specify some small clearance to limit fore-aft movement. I am going to make it tight and sand as required.
Adam has been busy so I am doing other things besides rigging the wings.
Bryan Cotton
Poplar Grove, IL C77
Waiex 191 N191YX
Taildragger, Aerovee, acro ailerons
dual sticks with sport trainer controls
Prebuilt spars and machined angle kit
Year 2 flying and approaching 200 hours December 23
Poplar Grove, IL C77
Waiex 191 N191YX
Taildragger, Aerovee, acro ailerons
dual sticks with sport trainer controls
Prebuilt spars and machined angle kit
Year 2 flying and approaching 200 hours December 23
-
Bryan Cotton - Posts: 5022
- Joined: Mon Jul 01, 2013 9:54 pm
- Location: C77
Re: Cotton Waiex 191 - N191YX
![]() by Bryan Cotton » Sun Jun 19, 2016 7:38 pm
by Bryan Cotton » Sun Jun 19, 2016 7:38 pm
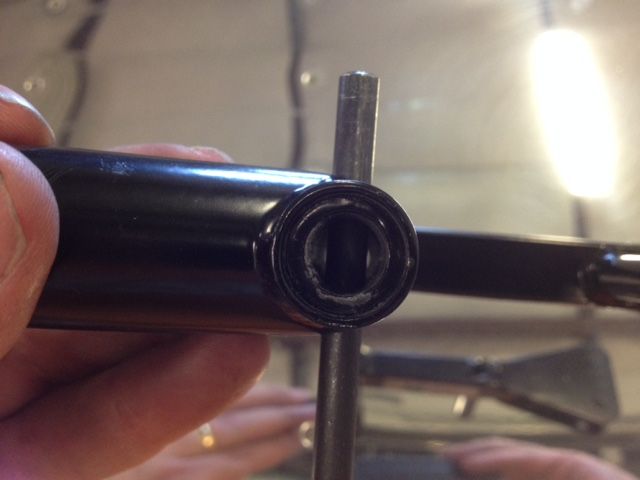
Here is the right stick jigged up on the drill press.

It came out good. I can see the bolt head and nut will not be sitting flat due to the geometry of the weldment.
Did you A) make a nifty shim, B) fill the void with epoxy, C) squash the weldment a bit, or D) don't tighten overmuch as this is a shear bolt anyway.

It came out good. I can see the bolt head and nut will not be sitting flat due to the geometry of the weldment.

Did you A) make a nifty shim, B) fill the void with epoxy, C) squash the weldment a bit, or D) don't tighten overmuch as this is a shear bolt anyway.
Bryan Cotton
Poplar Grove, IL C77
Waiex 191 N191YX
Taildragger, Aerovee, acro ailerons
dual sticks with sport trainer controls
Prebuilt spars and machined angle kit
Year 2 flying and approaching 200 hours December 23
Poplar Grove, IL C77
Waiex 191 N191YX
Taildragger, Aerovee, acro ailerons
dual sticks with sport trainer controls
Prebuilt spars and machined angle kit
Year 2 flying and approaching 200 hours December 23
-
Bryan Cotton - Posts: 5022
- Joined: Mon Jul 01, 2013 9:54 pm
- Location: C77
Cotton Waiex 191 - N191YX
![]() by Sonex1517 » Sun Jun 19, 2016 8:40 pm
by Sonex1517 » Sun Jun 19, 2016 8:40 pm
I went with D, but I used taper pins
Sent from my iPad using Tapatalk
Sent from my iPad using Tapatalk
Robbie Culver
Sonex 1517
Aero Estates (T25)
First flight 10/10/2015
325+ hours
Jabiru 3300 Gen 4
Prince P Tip
Taildragger
N1517S
Sonex 1517
Aero Estates (T25)
First flight 10/10/2015
325+ hours
Jabiru 3300 Gen 4
Prince P Tip
Taildragger
N1517S
-

Sonex1517 - Posts: 1651
- Joined: Fri Jun 03, 2011 10:11 am
- Location: Chicagoland
Re: Cotton Waiex 191 - N191YX
![]() by sonex892. » Sun Jun 19, 2016 11:24 pm
by sonex892. » Sun Jun 19, 2016 11:24 pm
Sonex1517 wrote:I went with D, but I used taper pins
Sent from my iPad using Tapatalk
Ditto with Robbie. Now using a taper pin. Replaced the bolt 3 years ago.
Steve
Sonex 892
Steve
Lazair kit 1981 sold
Sonerai 2LS plansbuilt 2003 sold
Sonex kit 2010
Sonerai 2LS project rotax 912
Lazair kit 1981 sold
Sonerai 2LS plansbuilt 2003 sold
Sonex kit 2010
Sonerai 2LS project rotax 912
-

sonex892. - Posts: 398
- Joined: Tue Oct 27, 2015 12:32 am
Re: Cotton Waiex 191 - N191YX
![]() by Bryan Cotton » Tue Jun 21, 2016 10:41 pm
by Bryan Cotton » Tue Jun 21, 2016 10:41 pm
Adam and I had a few details to finish up, like riveting the left hand aft root rib:
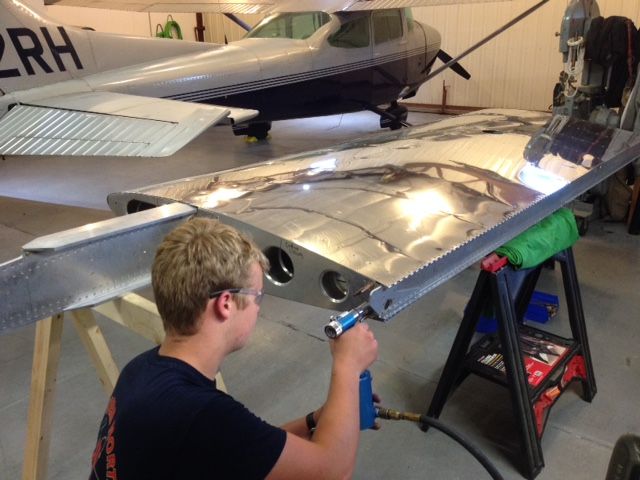
Then it was time!
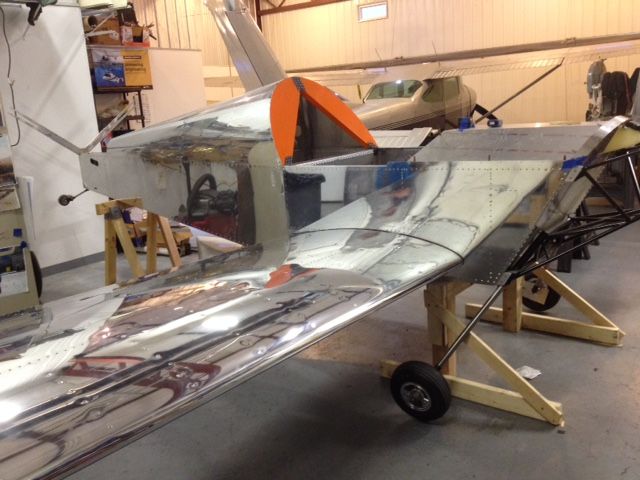
Our sawhorses were too high so we had to cut a couple wooden ones down 6".
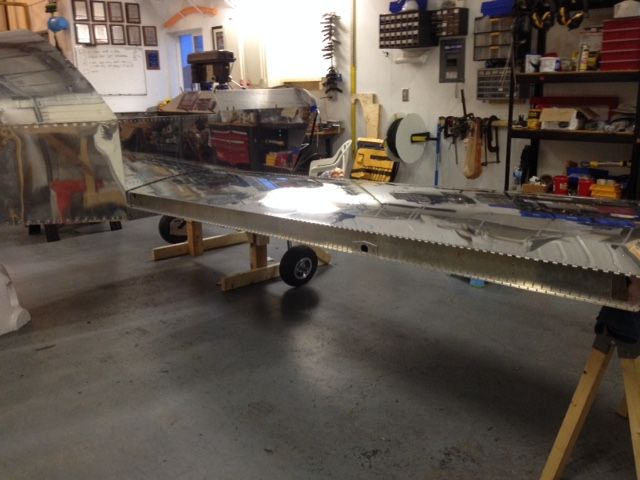
We didn't get the wings pinned, but hey it is a start!
Very cool. Reminds me of rigging a glider.

Then it was time!

Our sawhorses were too high so we had to cut a couple wooden ones down 6".

We didn't get the wings pinned, but hey it is a start!

Very cool. Reminds me of rigging a glider.
Bryan Cotton
Poplar Grove, IL C77
Waiex 191 N191YX
Taildragger, Aerovee, acro ailerons
dual sticks with sport trainer controls
Prebuilt spars and machined angle kit
Year 2 flying and approaching 200 hours December 23
Poplar Grove, IL C77
Waiex 191 N191YX
Taildragger, Aerovee, acro ailerons
dual sticks with sport trainer controls
Prebuilt spars and machined angle kit
Year 2 flying and approaching 200 hours December 23
-
Bryan Cotton - Posts: 5022
- Joined: Mon Jul 01, 2013 9:54 pm
- Location: C77
Re: Cotton Waiex 191 - N191YX
![]() by wlarson861 » Wed Jun 22, 2016 12:41 am
by wlarson861 » Wed Jun 22, 2016 12:41 am
Drilling the attach holes is a mentally draining exercise but is really easy. Make sure everything is lined up and go for it!! Over thinking and second guessing are the enemy. Getting the wings on permanently is a big milestone in the build and one you will relish as you finish everything else. Ready to see your report.
Bill Larson
N861SX
Sonex, polished, tail wheel, Generation 4 Jabiru 3300
N861SX
Sonex, polished, tail wheel, Generation 4 Jabiru 3300
- wlarson861
- Posts: 497
- Joined: Wed Dec 05, 2012 11:41 pm
Re: Cotton Waiex 191 - N191YX
![]() by Bryan Cotton » Thu Jun 23, 2016 10:33 pm
by Bryan Cotton » Thu Jun 23, 2016 10:33 pm
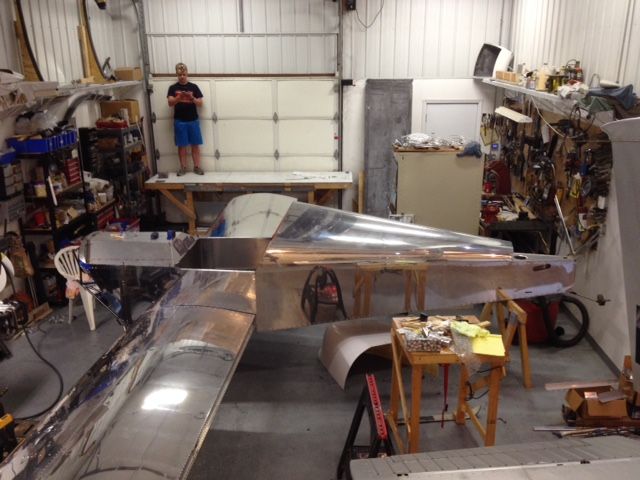
Wings are pinned together and to the rear carrythrough.
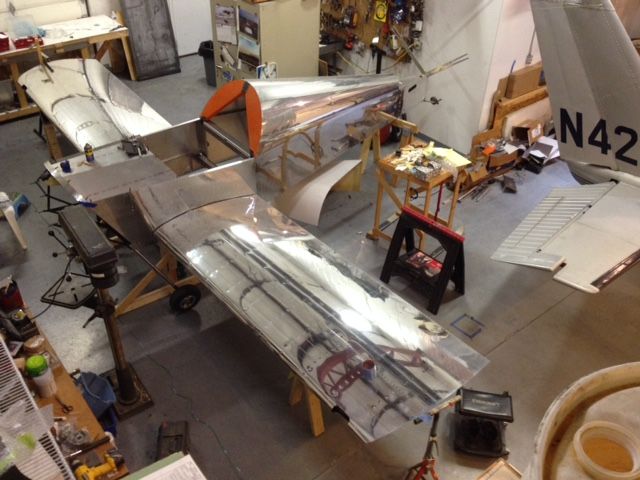
Level on one side:
And on the other side:
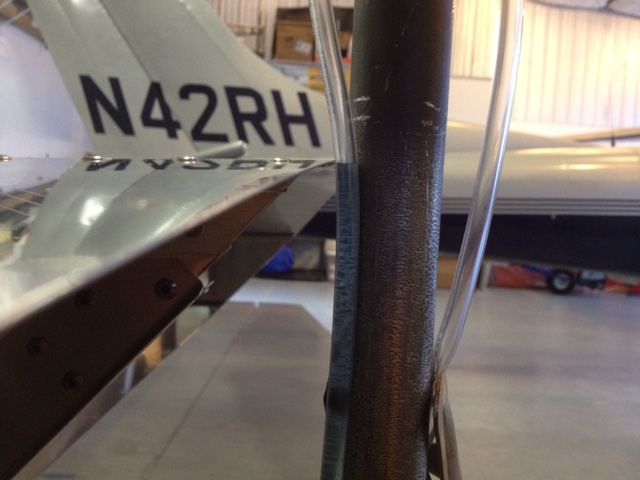
We used windshield washer fluid. See some of you Saturday at Clow!

Level on one side:

And on the other side:

We used windshield washer fluid. See some of you Saturday at Clow!
Bryan Cotton
Poplar Grove, IL C77
Waiex 191 N191YX
Taildragger, Aerovee, acro ailerons
dual sticks with sport trainer controls
Prebuilt spars and machined angle kit
Year 2 flying and approaching 200 hours December 23
Poplar Grove, IL C77
Waiex 191 N191YX
Taildragger, Aerovee, acro ailerons
dual sticks with sport trainer controls
Prebuilt spars and machined angle kit
Year 2 flying and approaching 200 hours December 23
-
Bryan Cotton - Posts: 5022
- Joined: Mon Jul 01, 2013 9:54 pm
- Location: C77
Who is online
Users browsing this forum: No registered users and 6 guests