

random user submitted photo
Darick's Sonex #1646
Re: Darick's Sonex #1646
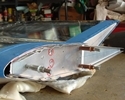
This is the back of the instrument panel with the 2" bottom extension and a small reinforcing angle at the midpoint currently held in place with 4 silver clecos.


Darick Gundy
Sonex #1646
N417DG
Taildragger, Aerovee, center stick, Prince P-Tip Prop
MGL E1, F2, V6 radio, Sandia Xponder, Reserve lift indicator (AOA), iFly 520
First flight! 10/21/2017
Sonex #1646
N417DG
Taildragger, Aerovee, center stick, Prince P-Tip Prop
MGL E1, F2, V6 radio, Sandia Xponder, Reserve lift indicator (AOA), iFly 520
First flight! 10/21/2017
-

Darick - Posts: 496
- Joined: Mon Aug 05, 2013 9:39 pm
- Location: PA
Re: Darick's Sonex #1646
Moving along with the tank trial fit. I'm installing the oops fitting so I'll be disassembling this. I thought the black cap was going to be too high and stick out above the filler neck but it turned out to be ok. I'll be painting the upper firewall white also.

There seems to be no easy way to install the tank as all the pieces that go into this area...glare shield, tank straps, firewall, etc., are all interconnected somehow. A helper at this point would be a big asset.

There seems to be no easy way to install the tank as all the pieces that go into this area...glare shield, tank straps, firewall, etc., are all interconnected somehow. A helper at this point would be a big asset.
Darick Gundy
Sonex #1646
N417DG
Taildragger, Aerovee, center stick, Prince P-Tip Prop
MGL E1, F2, V6 radio, Sandia Xponder, Reserve lift indicator (AOA), iFly 520
First flight! 10/21/2017
Sonex #1646
N417DG
Taildragger, Aerovee, center stick, Prince P-Tip Prop
MGL E1, F2, V6 radio, Sandia Xponder, Reserve lift indicator (AOA), iFly 520
First flight! 10/21/2017
-

Darick - Posts: 496
- Joined: Mon Aug 05, 2013 9:39 pm
- Location: PA
Re: Darick's Sonex #1646
I'm just another guy with an opinion, but I found it easier to remove/install the tank without the rudder pedal brackets in place. If you take them out the tank can move vertically, no need to tilt and slide, etc. to get it into position. Yep, lots of stuff lives in that space between the panel and the firewall. Crowded territory indeed.
- Waiex 49
Re: Darick's Sonex #1646
Two things I recently found out. One, don't rivet the firewall stiffener to the firewall first and then expect to easily install the fuel tank. Instead, rivet F17-10 clip to the top cross tie first, then the tank installation, then the stiffeners, then the firewall.
The whole reason for this is the bracket on the top cross tie is covered by the fuel tank. You'll understand when you get there.
Two, I didn't like the idea that the fuel tank will be resting on the three rivets holding the top stiffener clip, so I used flush rivets here. Picture below is worth a thousand words.

The forward most rivet is installed, the middle one is ready to be riveted. F17-10 clip can be partially seen below the cross tie.
The whole reason for this is the bracket on the top cross tie is covered by the fuel tank. You'll understand when you get there.
Two, I didn't like the idea that the fuel tank will be resting on the three rivets holding the top stiffener clip, so I used flush rivets here. Picture below is worth a thousand words.

The forward most rivet is installed, the middle one is ready to be riveted. F17-10 clip can be partially seen below the cross tie.
Darick Gundy
Sonex #1646
N417DG
Taildragger, Aerovee, center stick, Prince P-Tip Prop
MGL E1, F2, V6 radio, Sandia Xponder, Reserve lift indicator (AOA), iFly 520
First flight! 10/21/2017
Sonex #1646
N417DG
Taildragger, Aerovee, center stick, Prince P-Tip Prop
MGL E1, F2, V6 radio, Sandia Xponder, Reserve lift indicator (AOA), iFly 520
First flight! 10/21/2017
-

Darick - Posts: 496
- Joined: Mon Aug 05, 2013 9:39 pm
- Location: PA
Re: Darick's Sonex #1646
Moving on to the motor mount was detoured because more room was first needed in the garage workshop. My nice 4 X 8 work bench was reduced to a mini-me table.
Before

After

Before

After

Darick Gundy
Sonex #1646
N417DG
Taildragger, Aerovee, center stick, Prince P-Tip Prop
MGL E1, F2, V6 radio, Sandia Xponder, Reserve lift indicator (AOA), iFly 520
First flight! 10/21/2017
Sonex #1646
N417DG
Taildragger, Aerovee, center stick, Prince P-Tip Prop
MGL E1, F2, V6 radio, Sandia Xponder, Reserve lift indicator (AOA), iFly 520
First flight! 10/21/2017
-

Darick - Posts: 496
- Joined: Mon Aug 05, 2013 9:39 pm
- Location: PA
Re: Darick's Sonex #1646
There should be more information in the plans for installing the motor mount. Thank goodness for this forum.


Darick Gundy
Sonex #1646
N417DG
Taildragger, Aerovee, center stick, Prince P-Tip Prop
MGL E1, F2, V6 radio, Sandia Xponder, Reserve lift indicator (AOA), iFly 520
First flight! 10/21/2017
Sonex #1646
N417DG
Taildragger, Aerovee, center stick, Prince P-Tip Prop
MGL E1, F2, V6 radio, Sandia Xponder, Reserve lift indicator (AOA), iFly 520
First flight! 10/21/2017
-

Darick - Posts: 496
- Joined: Mon Aug 05, 2013 9:39 pm
- Location: PA
Re: Darick's Sonex #1646
Motor mount installed, but not bolted on yet. I had to get a larger counter sink to accommodate the bolt head.
Picture of how much I needed to remove from the lower fuselage mount, blue dash line.

After

Picture of how much I needed to remove from the lower fuselage mount, blue dash line.

After

Darick Gundy
Sonex #1646
N417DG
Taildragger, Aerovee, center stick, Prince P-Tip Prop
MGL E1, F2, V6 radio, Sandia Xponder, Reserve lift indicator (AOA), iFly 520
First flight! 10/21/2017
Sonex #1646
N417DG
Taildragger, Aerovee, center stick, Prince P-Tip Prop
MGL E1, F2, V6 radio, Sandia Xponder, Reserve lift indicator (AOA), iFly 520
First flight! 10/21/2017
-

Darick - Posts: 496
- Joined: Mon Aug 05, 2013 9:39 pm
- Location: PA
Re: Darick's Sonex #1646
Installed the fuel tank and decided to go with the tank vent that protrudes straight up. After reading Peter Anson's website, I bought his check valve to use with this tank vent. It has a small Teflon ball that keeps fuel from spilling out the vent in case of minus "g" maneuvers or an unfortunate upside down landing event.
The space between the vent fitting and the new style gas cap is really small, perhaps 1/64". I wonder if Sonex planned it this way or just a fortunate set of circumstances.
Also my building tolerances could have easily put that rivet in a worse position, i.e. too close to the vent.
Gas tank cap and vent view.

Close up view. You can just barely see light between the cap and vent. The fitting nut has to be turned with the flat of the hex "just right" or it would scrape the cap.

I also purchased Peter's 3D printed air vent and aileron adjusters.
The space between the vent fitting and the new style gas cap is really small, perhaps 1/64". I wonder if Sonex planned it this way or just a fortunate set of circumstances.
Also my building tolerances could have easily put that rivet in a worse position, i.e. too close to the vent.
Gas tank cap and vent view.

Close up view. You can just barely see light between the cap and vent. The fitting nut has to be turned with the flat of the hex "just right" or it would scrape the cap.

I also purchased Peter's 3D printed air vent and aileron adjusters.
Darick Gundy
Sonex #1646
N417DG
Taildragger, Aerovee, center stick, Prince P-Tip Prop
MGL E1, F2, V6 radio, Sandia Xponder, Reserve lift indicator (AOA), iFly 520
First flight! 10/21/2017
Sonex #1646
N417DG
Taildragger, Aerovee, center stick, Prince P-Tip Prop
MGL E1, F2, V6 radio, Sandia Xponder, Reserve lift indicator (AOA), iFly 520
First flight! 10/21/2017
-

Darick - Posts: 496
- Joined: Mon Aug 05, 2013 9:39 pm
- Location: PA
Re: Darick's Sonex #1646
The left main landing gear has been drilled at the top. I chose to drill it in place as I don't think my drill press set up would be accurate enough. Plus I had to tap the gear leg in place and it would be very difficult to line up the drilled hole with the existing bolt hole tube. The bolt in this picture is temporary until the correct length arrives in the mail.

It took about three hours to drill the left gear. I started with 15/64 (the existing hole size in the bolt tube) and just drilled in enough to give a center point, then #30, 3/16, 15/64, drilling in only about 1/8" at a time, repeating the sequence until all the way through. Then finished up with 1/4". Since it was such a deep hole, about 2-1/2", the chips had to be cleared VERY frequently by fully withdrawing the drill bit.
I had to take a break from this so decided to assemble the wheels since the toe in would be the next step. I'm using the hydraulic brakes. The bolts holding the assembly together stand proud of the brake disc so I had to grind off about .020-.030.

Darick Gundy
Sonex #1646
N417DG
Taildragger, Aerovee, center stick, Prince P-Tip Prop
MGL E1, F2, V6 radio, Sandia Xponder, Reserve lift indicator (AOA), iFly 520
First flight! 10/21/2017
Sonex #1646
N417DG
Taildragger, Aerovee, center stick, Prince P-Tip Prop
MGL E1, F2, V6 radio, Sandia Xponder, Reserve lift indicator (AOA), iFly 520
First flight! 10/21/2017
-

Darick - Posts: 496
- Joined: Mon Aug 05, 2013 9:39 pm
- Location: PA
Re: Darick's Sonex #1646
On the gear!


Darick Gundy
Sonex #1646
N417DG
Taildragger, Aerovee, center stick, Prince P-Tip Prop
MGL E1, F2, V6 radio, Sandia Xponder, Reserve lift indicator (AOA), iFly 520
First flight! 10/21/2017
Sonex #1646
N417DG
Taildragger, Aerovee, center stick, Prince P-Tip Prop
MGL E1, F2, V6 radio, Sandia Xponder, Reserve lift indicator (AOA), iFly 520
First flight! 10/21/2017
-

Darick - Posts: 496
- Joined: Mon Aug 05, 2013 9:39 pm
- Location: PA
Who is online
Users browsing this forum: No registered users and 35 guests


