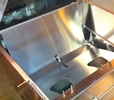


random user submitted photo
Flap motor wiring
8 posts
• Page 1 of 1
Flap motor wiring
I'm away from home for the rest of the week trying to make a list of details I have to attend to yet and wiring the electric flap motor is one of them. Does anyone know if that is mentioned on the plans, although I don't recall seeing it. I looked on the Sonex website for a diagram but didn't find one. If someone knows where to find find that information or knows how it's wired I would appreciate your help. There's a red wire and black wire ar the bottom of the motor and the same at the top plus a white wire. I could contact Kerry but I sure he has enough to do.
- wingnut99
- Posts: 99
- Joined: Wed Nov 14, 2018 12:32 am
Re: Flap motor wiring
The three wires on the end sounds like the connections to a feedback potentiometer but it could be digital (unlikely). I would contact Kerry for specifics. I have an earlier B-model kit without the feedback potentiometer.
Paul
Paul
- thomas
- Posts: 59
- Joined: Sat Aug 27, 2016 9:45 am
Re: Flap motor wiring
You could be right. I'm sure the Dynon HDX has the capability to display the flap position so I guess there would have to be a way for it to be fed information from a piece of hardware from the flaps or directly from the motor itself. That would be useful information. I haven't bothered him recently so it's probably time. Thanks
- wingnut99
- Posts: 99
- Joined: Wed Nov 14, 2018 12:32 am
Re: Flap motor wiring
Hi Wingnut! (cool name)
If your flap motor has the potentiometer you will see thin red black and white wires coming out of the smaller device attached to the motor. The thicker twisted pair of red and black is for the motor itself. I successfully wired my potentiometer into the Garmin system as follows: red: 12v+DC, black: ground, and white: signal. The potentiometer sends out an analog value on that white wire not digital. The Garmin allows you to program each flap position as a value coming over the signal wire. As an example, set your flaps to 0 degrees and it may come up with a value of 200ohms. Save that data point and set the flaps to 10 degrees and save that corresponding ohms value. 20 degrees, 30 degrees, etc,.
I am not acutely familiar with Dynon systems and as such I do not know how this is possible in the Dynon system. I am sure they have a similar way of integrating the signal and custom data points but that would be something you would have to research. For instance, their engine management device may have the ability to include position sensors such as the flap potentiometer and I would wire it up based on what the Dynon manual states. I hope this helps, feel free to reach out if you have any other questions.
-Tim
-

n307tw - Posts: 154
- Joined: Mon May 29, 2017 9:03 pm
- Location: Long Island, NY
Re: Flap motor wiring
I'll have to see what the user manual says. I know the black and red wires on the bottom moved the flap arm when I touched them to a battery but the one's on top with the white wire did nothing. Kerry sent me a wiring diagram and it looks like those go to the up and down momentary switch. Following that should get them working but it would be convenient if they can also connect with the Dynon and display the settings even if it isn't controlled from there. Thanks
- wingnut99
- Posts: 99
- Joined: Wed Nov 14, 2018 12:32 am
Re: Flap motor wiring
wingnut99 wrote:I'll have to see what the user manual says. I know the black and red wires on the bottom moved the flap arm when I touched them to a battery but the one's on top with the white wire did nothing. Kerry sent me a wiring diagram and it looks like those go to the up and down momentary switch. Following that should get them working but it would be convenient if they can also connect with the Dynon and display the settings even if it isn't controlled from there. Thanks
Please don’t wire the thin red/black/white wires to switches. It is a potentiometer the only purpose is to tell you the position of the flap arm. Inadvertently putting voltage on the wrong wire may damage it. Reread what I posted above; the setup I described above works perfectly on my B-model. The thick twisted red/black wire that you said moved the arm is what you should be controlling with switches. Reversing the voltage on those two wires will either extend or retract the arm. If you need additional information I encourage you to PM me.
Good luck!
-Tim
-

n307tw - Posts: 154
- Joined: Mon May 29, 2017 9:03 pm
- Location: Long Island, NY
Re: Flap motor wiring
Wingnut,
I did a bit of research and the Dynon system can control your flaps (and other accessories) with the Dynon Advanced Control Module. You wire the potentiometer (THIN red, black, white) into it to monitor the position of the flap arm. Wire in a separate flap switch and the ACM will apply or reverse the voltage to control the extension or retraction of the arm. You can read the manual I found at the address here. If you don't care about monitoring the position of your flaps then just tape off and ignore those three thin red/white/black wires and use the thicker red/black wires and wire it up as per Kerry's advice to a switch. Good luck!
-Tim
-

n307tw - Posts: 154
- Joined: Mon May 29, 2017 9:03 pm
- Location: Long Island, NY
Re: Flap motor wiring
Thanks Tim. I'll check the manual. I recall seeing instructions on connecting an electric trim motor so I'm sure the electric flap information is there too. Might as well connect it to the EFIS. It's capable of doing more than I'm able to remember.
- wingnut99
- Posts: 99
- Joined: Wed Nov 14, 2018 12:32 am
8 posts
• Page 1 of 1
Who is online
Users browsing this forum: No registered users and 4 guests


